ARM7 second-generation driver board Robot-Driver program programming tutorial
The main chip used by the second-generation driver board Robot-Driver is different from the first-generation board. It uses an ARM7 core processor. Of course, the programming of this processor is also different from other 51-core boards. Then today’s tutorial is based on the picture to explain how to burn the second generation ARM7 driver board.
First, prepare the burning tool and the firmware to be burned. Our previous burning program used STC-ISP of Hongjing Company. The burning tool of the second-generation board Robot-Driver is Flash Magic. This tool can be downloaded by google.
In terms of hardware: the second-generation board burning tool is compatible with the first-generation board, and both use the studio’s burning small board.
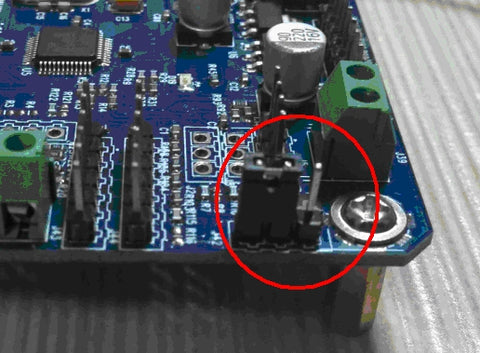
First step:
Set the jumper cap to ISP mode on the board

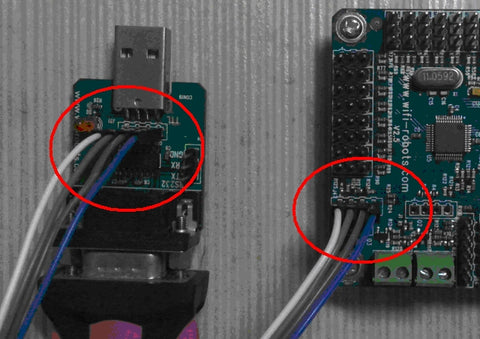
The second step:
As shown in the figure below, follow the wire sequence to connect our programming board and the programming serial port of Robot-Driver.
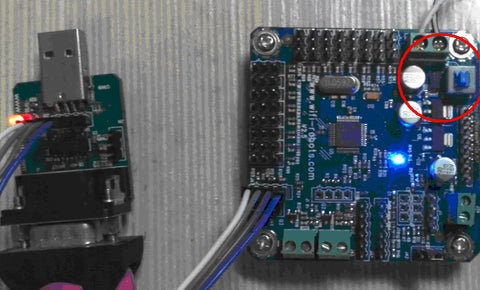
Third step:
Turn on the power of Robot-Driver, and you can see the red light on the programming board is on.
The fourth step:
Open the burning software Flash Magic and set the burning parameters as shown in the figure below:
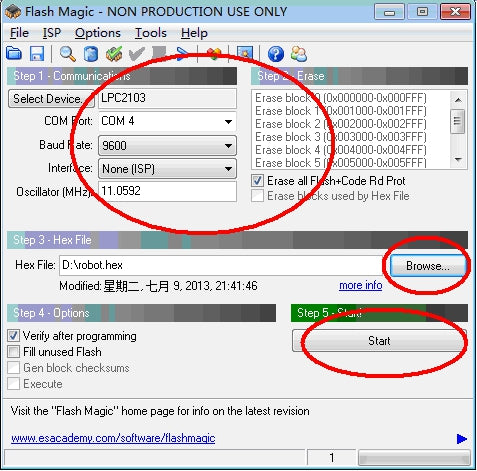
After clicking the Start button of the software, you can see that the software is burning the bin file to the FLASH area of the chip:

After the burning is completed, the software will display Finish at the bottom:

The fifth step:
After programming is completed, power off, and set the ISP jumper cap back to normal mode.