

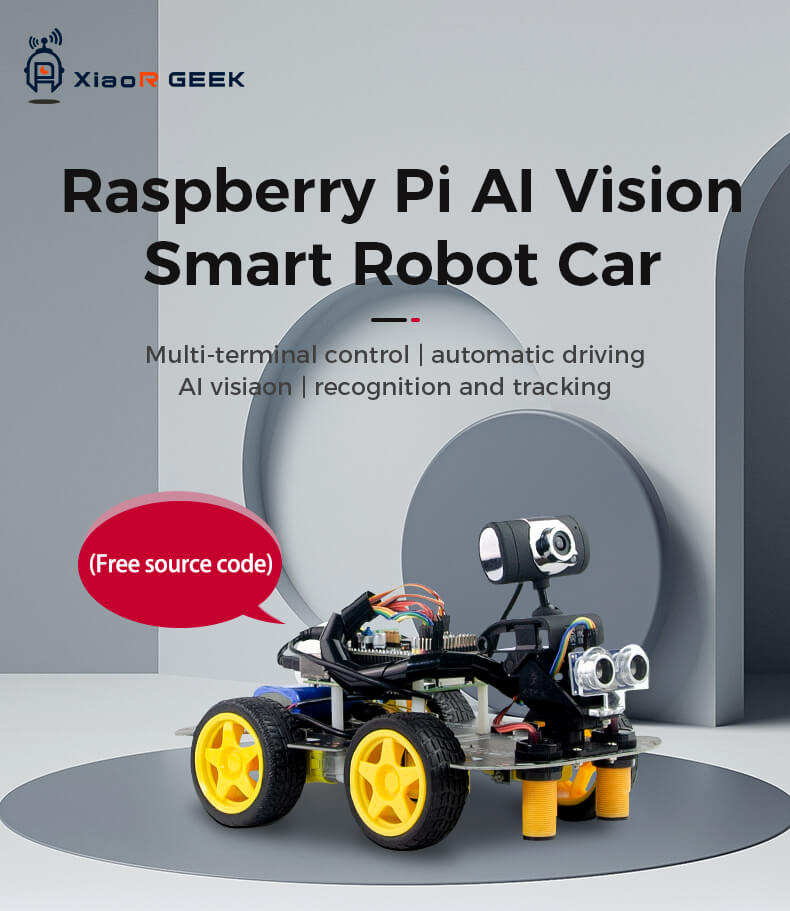
1.Hardware selection and preparation:
Raspberry Pi 5 motherboard: As the core controller of the robot, the DS version of Raspberry Pi 5 uses 4GB. This size can be selected according to personal needs.
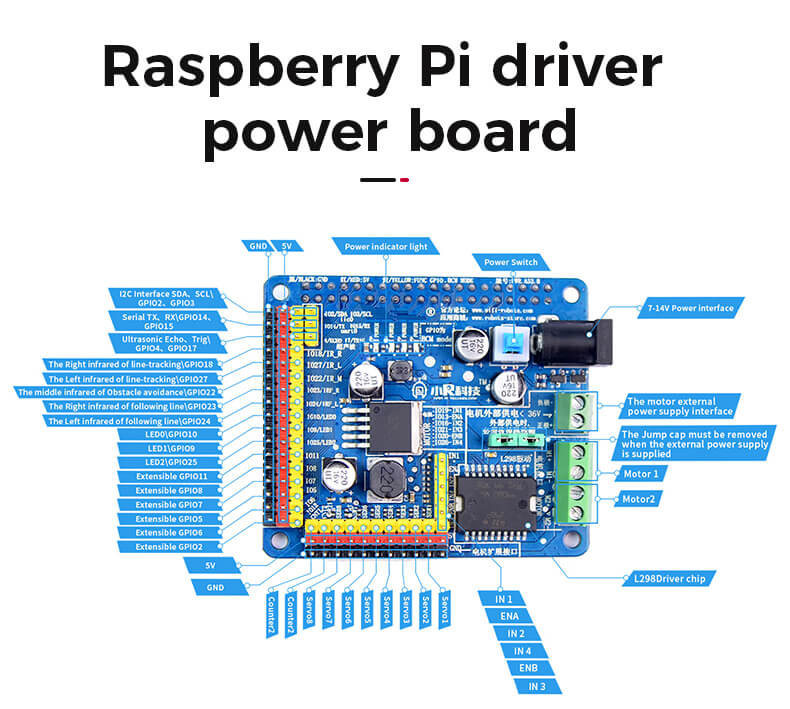
Motor and drive: The drive board uses XR’s self-developed drive board, and the motor is a TT motor, which is used for the mobile function of the robot.
Sensors: The sensors included in the DS car include ultrasonic sensors, infrared sensors and cameras, etc., which are used for OpenCV AI vision, line patrol, distance measurement and other gameplay.
Power supply: The DS machine car is a 7.4V lithium battery pack, which provides stable power supply for the Raspberry Pi and motor.
Other electronic components: such as connecting wires, resistors, capacitors, etc.
2. Install the operating system:
Install a suitable operating system on the Raspberry Pi 5, such as Raspbian, a Linux distribution customized for the Raspberry Pi.
3.Software installation and configuration:
According to project requirements, install appropriate programming environments and development tools, such as Python, C++, etc.
Install the necessary libraries and frameworks to control hardware such as motors and sensors. For example, the GPIO library is used to control GPIO pins.
4.Write a program:
Write the control program for the robot using the programming language of your choice. Realize the basic movement functions of the robot, such as forward, backward, turning, etc.
The Raspberry Pi DS car uses Python3 as the main programming language, Op source CV as the image processing library, and a two-degree-of-freedom gimbal. This enables various intelligent AI recognition methods such as face tracking, color following, and QR code recognition to be implemented on the APP. It also integrates infrared sensors and ultrasonic sensors to achieve functions such as line following, ultrasonic obstacle avoidance, ultrasonic maze walking, and infrared release.
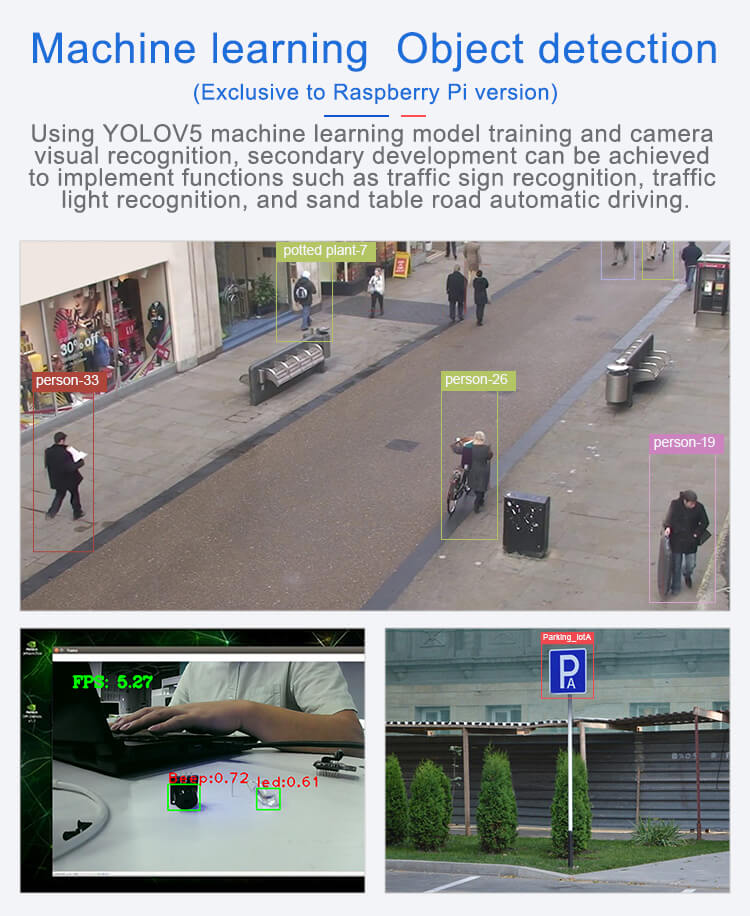
The Raspberry Pi DS car also has advanced functions of deep learning neural networks. The target detection algorithm is used to achieve photo collection, model training, and model inference of a certain object. Of course, you can deploy YOLO V5 in actual projects to realize the recognition of more objects.
You can also use YOLO V5 machine learning model training and camera visual recognition, which can be developed for secondary functions such as traffic sign recognition, traffic light recognition, and sand table road automatic driving.

5. Testing and debugging:
Test your robot's features in a real-world environment to make sure they work as expected.
Make adjustments and optimize procedures based on test results.
6. Function expansion and control:
There are many holes reserved on the Raspberry Pi DS car. You can enhance the functionality of the robot by connecting more sensors and actuators as needed.
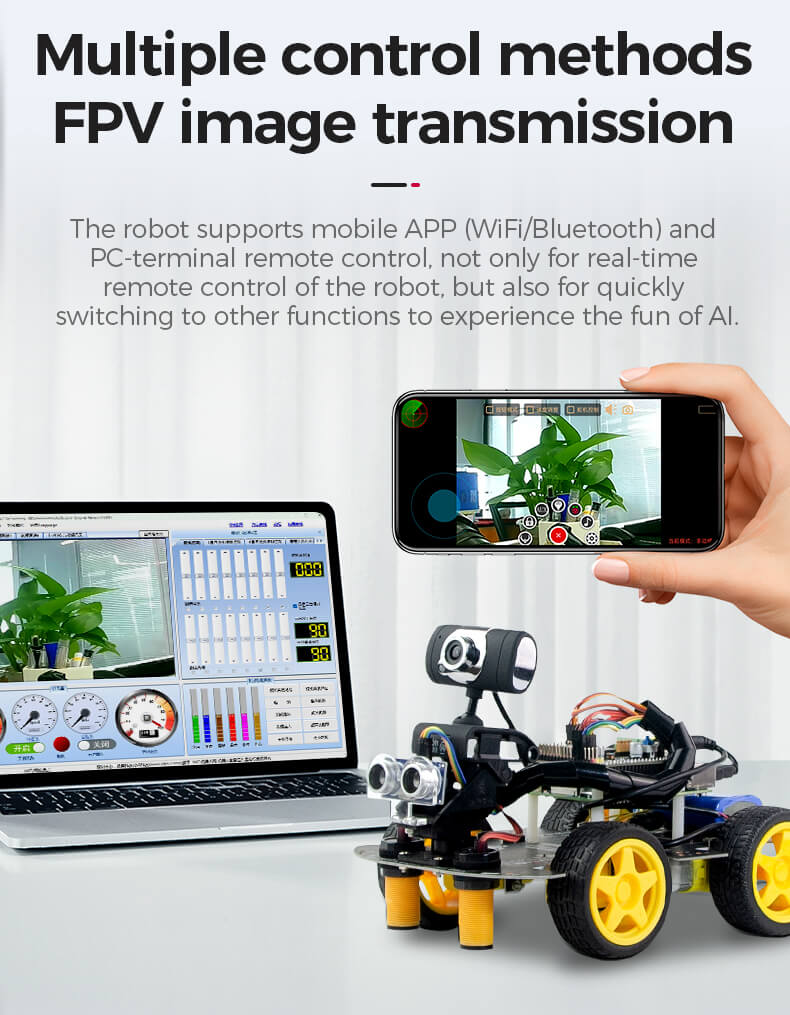
The Raspberry Pi DS car supports wireless communication 802.11b/g/n protocol and can be remotely controlled through iOS APP, Android APP and PC client.
Deployment and use:
Deploy the final program to the Raspberry Pi 5 and start the robot.
Interact with the robot via console, graphical interface, or mobile app.
Please note that the process of creating a Raspberry Pi robot may involve complex programming and hardware knowledge and may be challenging for beginners. Therefore, it is recommended to consult relevant tutorials, refer to open source projects, or seek help from the community to better complete this project. At the same time, make sure to follow safety regulations during operation to avoid damaging hardware or causing other potential risks.