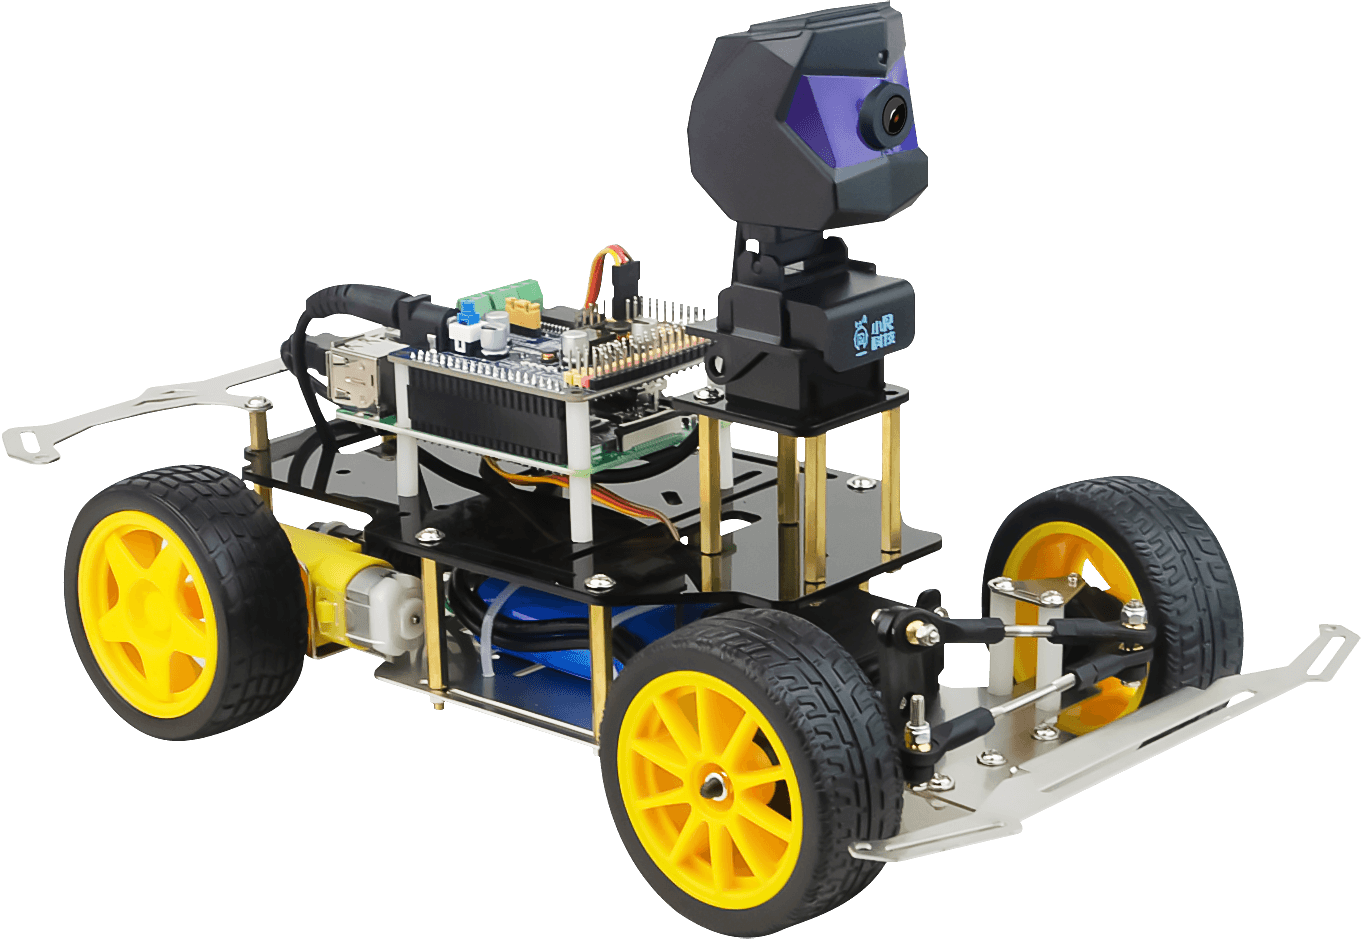
I、Racing track Arrangement
1. The width of racing track asked for times wide of the car, if the track is too narrow, thecar won’t patrol roads normally, on the other hand, if the track is too wide, the camera can’t catch the racing track.
2. The racing track can be made by white electrical adhesive tape in the width of 5cm, dual carriageway, shape can be customized.

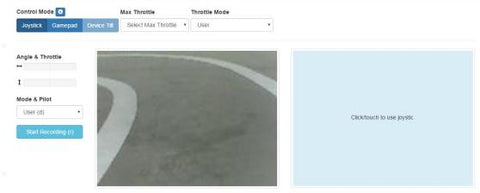
II、Location of camera The camera look straight ahead, and the angle can be tilted slightly to the ground (you canadjust it after the program is started). The white dual carriageway needs to be seen in the videoarea get from the camera.
Below is the video image after program is started for reference:
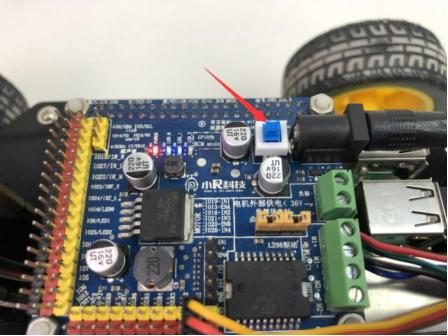
III.Starting XR-F1 Turn on power switch
Operation in computer
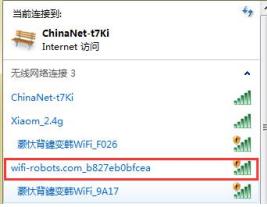
1.Find the wifi listing named “wifi-robots.com in computer , shown as below:
2.Find the software of “putty”, download and operation ,open it as per the below configuration
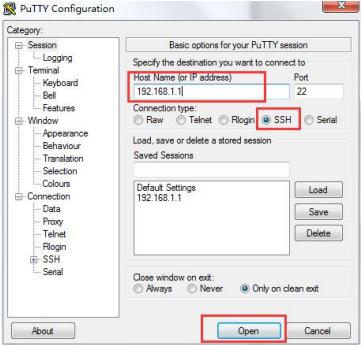
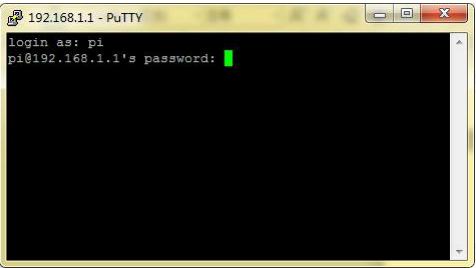
3.Enter the username: pi Enter Key Enter the password: raspberry Enter Key (Here the password is not showed)
4.After login to raspberry, enter below command respectively:
source /home/pi/py3env/bin/activate Enter Key
cd ~/mycar Enter Key
python manage.py drive Enter Key
5.After enter the above command, you will wait to see below message :
You can now go to http://xxx.xxx.xxx.xxx:8887 to drive your car
and next enter: http://192.168.1.1:8887/drive in UC explorer or GOOGLE Chrome to control page, drag the mouse to right side area to control XR-F1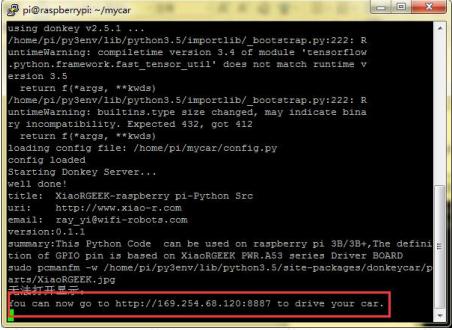
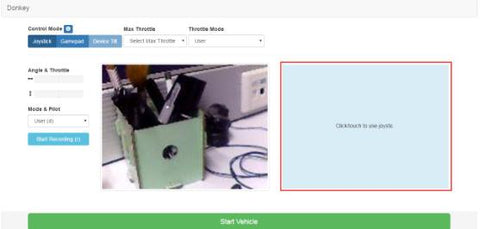
6.Control page is can be opened by Google Chrome and enter above mentioned website after connected with signal of XR-F1,choose Control Mode of “Device Tilt”, what’s more, it’s available to use the phone’s gravity sensor to control the car.
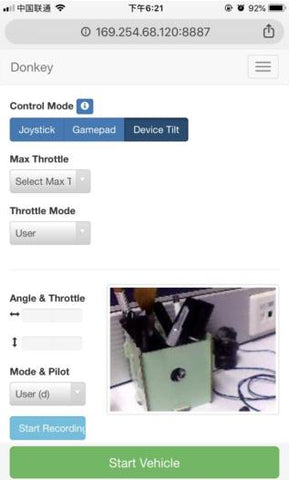
7.After control page opened, it’s time to do the training in the racing track we’ve made ,we
suggest to use the phone to control the car, as it’s much more stable to compare with by
computer, the car of XR-F1 would be trained by phone to drive in a circle continuous, if runs out of the racing track, click “Stop Recording” to stop catching, and then put the car back to the previous location to keep training. If the speed of car is too fast, it can be adjusted by the mode of “Max Throttle”, but we always suggest that keep slow speed when training. In a short, the training time we spent is much longer, the mistake is hardly happened when automatic driving.
8.When training finished, the training data needs to be copied from raspberry system. Firstly
download the software of “WINSCP”, and then login to WINSCP, enter:
username: pi
password: raspberry
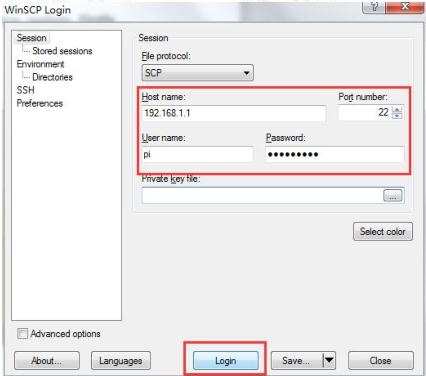
9.After login, find the file of /home/pi/mycar and open, copy the “tub”file to computer.
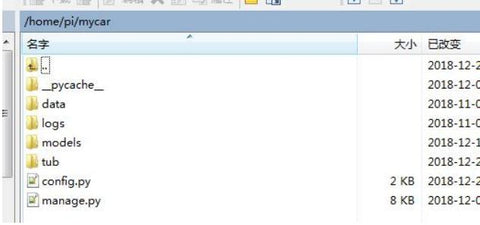
10.In the file of “tub”, it’s all the pictures we taken when training and the data of each accelerator angle, these data still need to do training again, in fact , this training is also can be made in the raspberry system ,but the performance of raspberry is too low ,if made by computer ,the training time can be shorter.
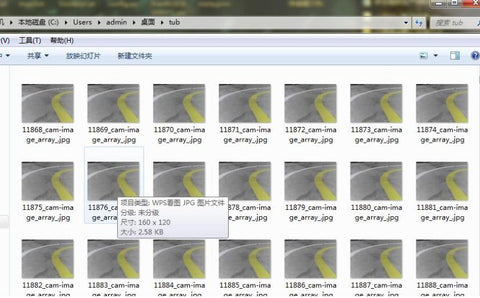
11.Before training, we still need to install linux virtual machine to use the VM software to start Linux, for Linux system, we suggest using the version of ubuntu16--can be download from website. Virtual machine after installed and started, we also need to install another software “Samba” to connect the files between ubuntu and our windows computer. When Samba installed, copy tub files to our ubuntu system.
Ubuntu system procedure:
1)Download and Install VMware Tools
Choose VMware-->Install VMware Tools
2)Install Samba to share the files between windows and ubuntu
sudo apt-get install samba
sudo apt-get install smbclient
sudo nano /etc/samba/smb.conf
After entering above command, please add below words:
[share]
comment=this is Linux share directory
path=/home/share
public=yes
writable=yes
sudo /etc/init.d/samba start
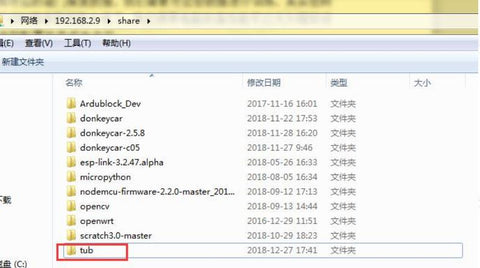
12.After tub files copy to utuntu system, next we need to install training environment of XR-F1 in Ubuntu.
Install environment made by below command after control page opened:
1.sudo apt-get install virtualenv build-essential python3-dev gfortran libhdf5-dev
2.virtualenv -p /usr/bin/python3 py3env
3.source /home/huangxing/env/bin/activate
4.python -m pip install --upgrade pip
5.pip install tensorflow==1.8.0
6.git clone https://github.com/wroscoe/donkey donkeycar
7.cd donkeycar
8.pip install -e .
Attention: the third line of “huangxing” need to change to “your” ubuntu system name,
otherwise the route is incorrect.
13.When the environment installed finished, training can be started.
Enter: source /home/huangxing/env/bin/activate to start “python3” environment.
14.Copy the whole file of mycar under the folders /home/pi to ubuntu system, enter mycar route by cd command
15.To start training, enter: python ~/mycar/manage.py train --model ~/mycar/models/mypilot
Remark:
Once training started, we just need to wait the training finished, the training time is depends on the computer configuration, high configuration means the shorter training time, besides, graphics card high performance mode needs to be opened in computer.
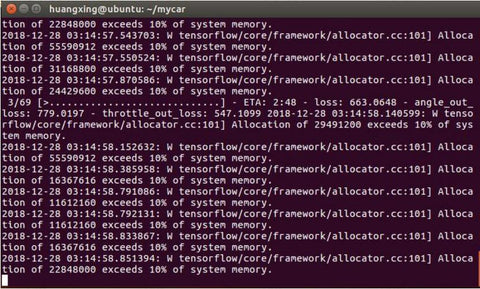
16.We will get models of mypilot under mycar/models of ubuntu after training finished, then
copy mypilot to the same catalog in raspberry.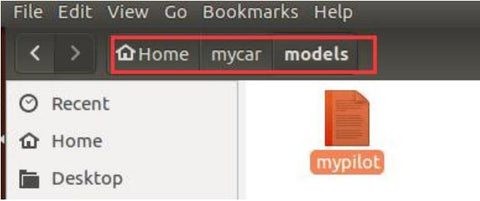
17.Starting training data in raspberry:
source /home/pi/py3env/bin/activate
cd ~/mycar
python manage.py drive --model ~/mycar/models/mypilot
18.Back to control page again, choose “Local Pilot(d)”in Mode&Pilot, auto driving will be started when XR-F1 put to racing track.
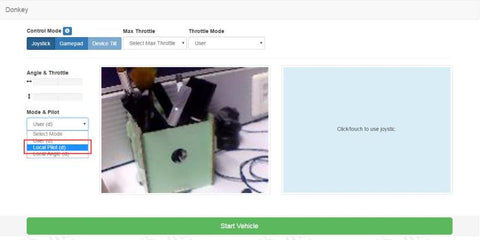
19.Auto driving is based on the route you have trained, if the car is trained in clockwise, the
direction of the car driving can just move in clockwise, if you want the car runs in clockwise and anticlockwise ,car training need to be made in both direction.

